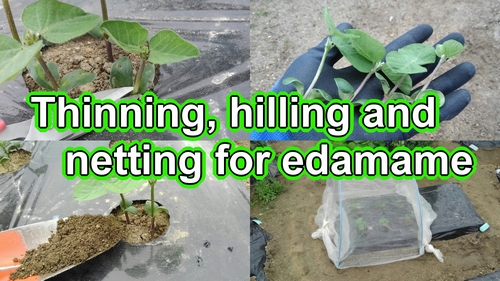
Edamame growing guide (Thinning and hilling and setting up insect netting for edamame)
Growing edamame bean plant in a home garden. (Edamame beans how to grow?) Last time, I planted edamame seeds (Japanese edamame bean plant). About two weeks have passed since then. This time, I will thin out the edamame, hilling around the plants, and set up a insect netting. (We’re going to take care of growing edamame plants this time.)
When to plant edamame seeds? The usual time to plant edamame seeds is from mid-April to early May, but this year (2022), I planted the edamame seeds in early April. The link explains how to plant edamame seeds.
Thinning and hilling edamame (Edamame plant care)
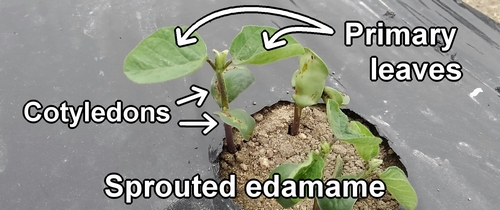
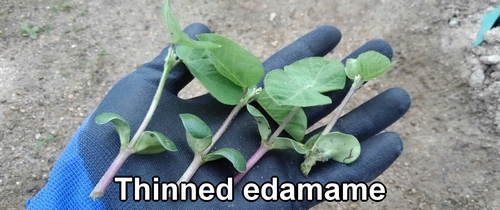
Edamame has sprouted and the primary leaves (unifoliolate leaves) have appeared. Primary leaves are the leaves that come after the cotyledons (the seed leaves) of edamame plant. The time to thin out edamame is when these primary leaves appear.

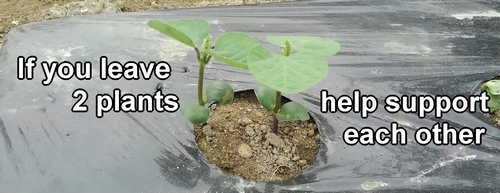
For thinning edamame, keep 2 plants in each hole of the mulch. (It’s common to leave 2 plants when thinning edamame.)
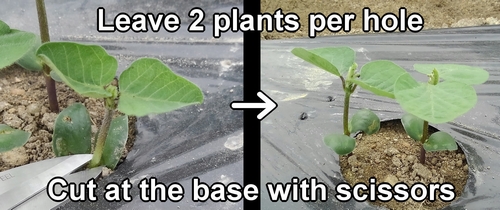
The trick for thinning edamame is to cut the roots of the plants with scissors. Pulling out the plants by hand might hurt the roots of the ones you want to keep, so it’s safer to use scissors. If the sprouted edamame plants are crowded, be extra careful.
Leaving 2 plants when thinning edamame helps prevent them from falling over. Edamame plants can grow tall, but their stems are quite thin. If you only have one plant, it might fall over in strong wind.
If you leave 2 edamame plants, their branches and leaves will help support each other. This makes them less likely to fall over in strong wind.
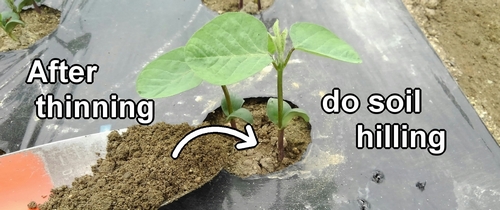
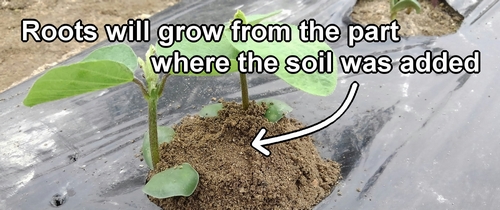
After thinning, do soil hilling for edamame bean plant. Soil hilling means adding soil around the base of the plant. This helps strengthen the base of edamame, prevent falling over, and improves root growth.
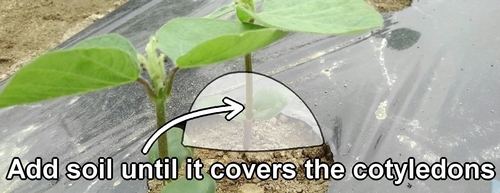
Add soil until it covers the cotyledons of the edamame. Since the bed is covered with mulch, you can’t add a lot of soil, but try to add as much as you can.
Edamame will grow roots from the part where the soil was added (the part with extra soil). These roots are called adventitious roots. Adding soil helps increase the number of roots, making the plant grow stronger.
Edamame pest control (Putting a insect netting over the edamame patch)
After thinning out the edamame plants and hilling up the soil, set up a insect netting over the bed. The netting is to keep pests away.
The most troublesome pest is the stink bug, which comes when the edamame pods start to swell. If stink bugs suck the juice from the pods, the edamame will taste bad, so it’s important to use a insect netting to protect them.
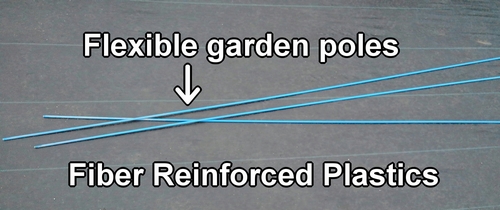
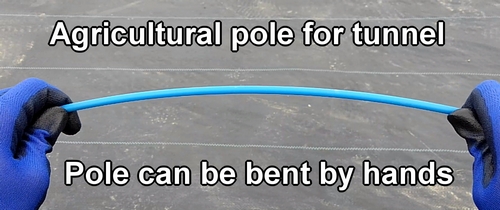
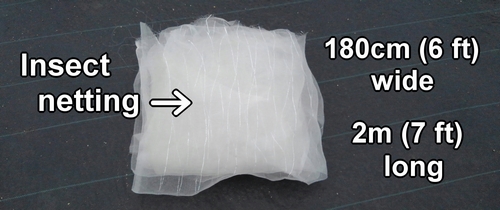
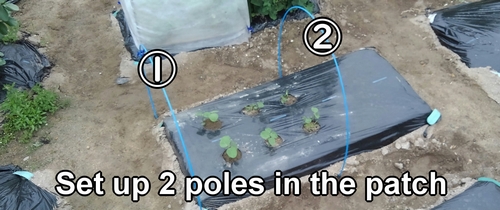
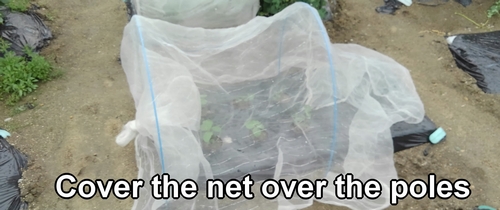
The poles to set up in the edamame patch should be made of FRP (Fiber Reinforced Plastic) because they are light, strong, and easy to handle. I recommend them. The insect netting should be about 180cm (6 feet) wide and 2m (7 feet) long.
Here’s how to set up a basic insect netting.
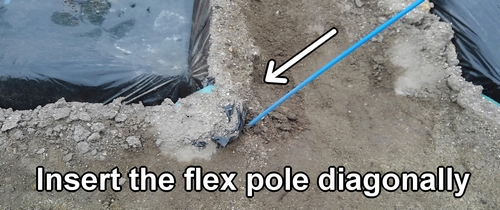
Insert the flexible poles diagonally toward the inside of the bed and set up 2 poles. The poles should be inserted about 20cm to 30cm (8 inches to 12 inches) deep.
Cover the net over the poles. The insect netting has colored lines in the center, so place it with the lines in the middle of the bed.
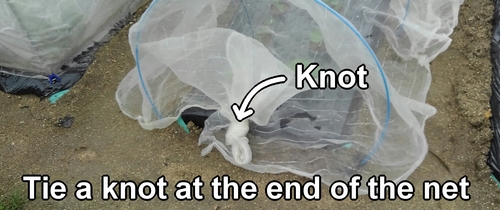
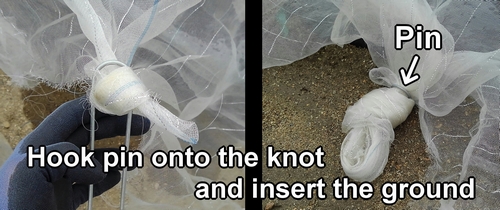
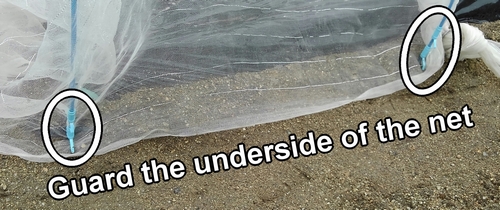
Make 3 knots in the net, and put U-shaped garden pins through them to stick them into the ground to hold it in place. Please be careful not to insert the pin directly into the insect netting as it may cause holes.
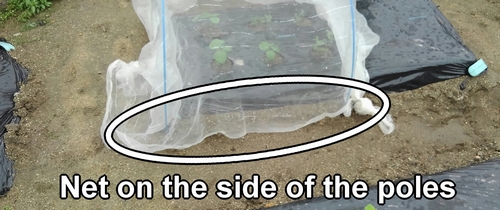
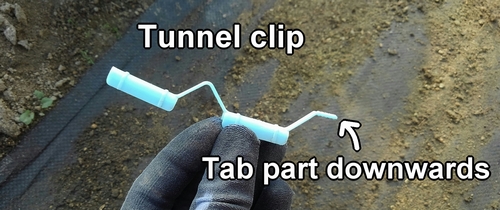
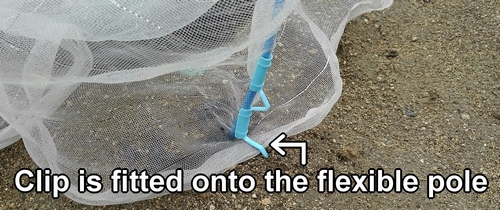
The insect netting on the side of the flexible poles is secured with a tunnel clips. The tunnel clips are fitted onto the flexible poles, sandwiching the insect netting in between. The tunnel clip is used with the projection part facing downwards. (Embed the projection part slightly into the ground.)
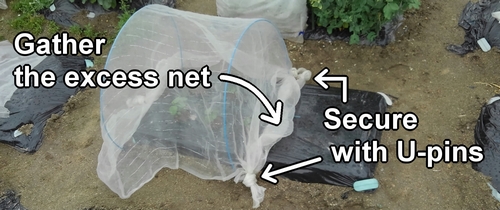
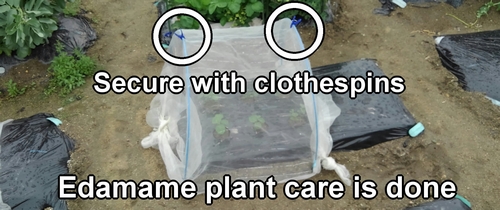
Tie and gather any excess of the insect netting.

Secure the insect netting with clothespins. Here, thinning, hilling up, and setting up the insect netting for the edamame are done.
Following is the video for how-to. English subtitles are available.