Prep soil for daikon radish and solar soil sterilization (Grow Japanese daikon radish)
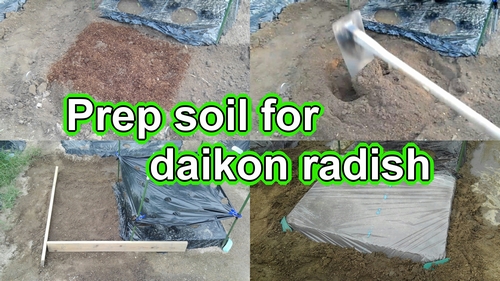
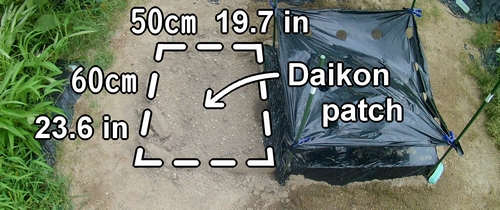
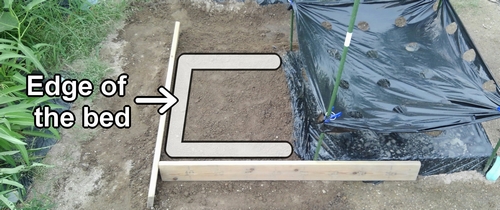
Grow Japanese white radish (daikon radishes) in rental patch. This time, I will prepare the soil and make the bed for growing daikon radish (Japanese white radish). The bed size for growing daikon radish is about 60cm x 50cm (23.6 inches x 19.7 inches).
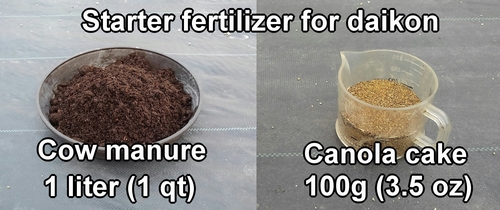
Starter fertilizer for daikon radish (Best organic fertilizer for Japanese white radish) – Daikon radish how to grow?
For growing daikon radish, the needed fertilizer (starter fertilizer) is 1 liter (1 qt) of cow manure and 100g (3.5 oz) of canola cake. (Best starter fertilizer for Japanese daikon radish.)
The prepared daikon fertilizer is mixed in a bucket, then spread over the plot and mixed with the soil.
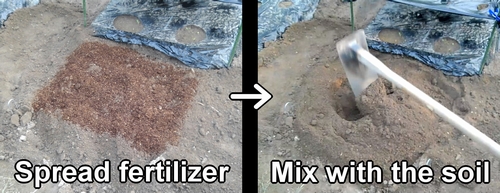
The important part of growing daikon radishes is preparing the soil. If fertilizer is left in clumps, the daikon might grow with split roots, so be sure to till the soil well.
If possible, it’s good to till it to a depth of about 30cm (1 foot). Also, if there are big stones or anything that could block the daikon roots, remove them too.
Prepare the bed for daikon radish (Make the bed for growing Japanese daikon radishes)
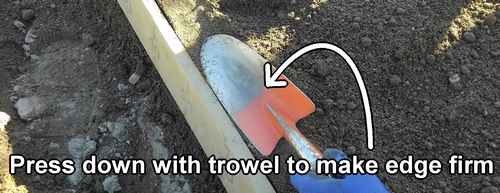
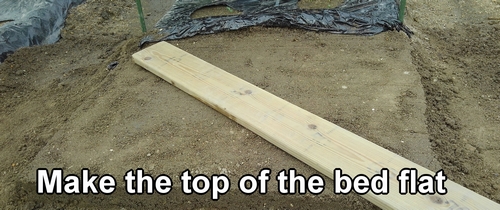
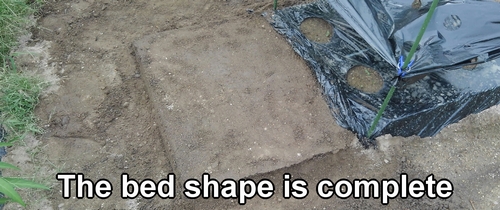
After fertilizing, the next step is to create the bed for Japanese daikon radish. Shape the bed with a trowel and wooden boards.
As a tip for making the daikon radish bed, use a trowel to press the edges of the bed and make it slightly compacted. If you press the edges of the bed, you can maintain the shape of the bed.

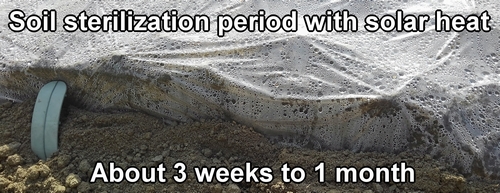
Soil sterilization by heat (Methods of soil sterilization)
After making the bed, sterilize the soil. (Soil sterilization by heat.) The reason for sterilizing the soil is that the soil used for growing spring and summer vegetables might have insect eggs or germs hiding in it. So, just in case, we sterilize the soil before starting to grow autumn and winter vegetables.
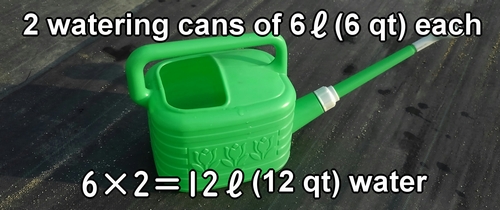
The specific steps for sterilizing the soil are: first, pour two watering cans of water on the bed.

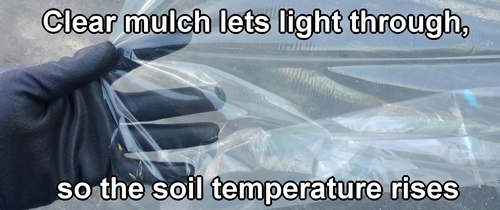
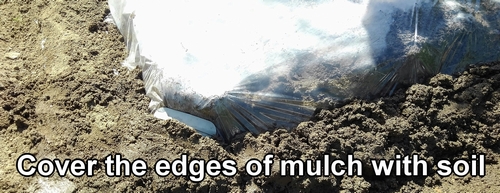
After pouring the water, I will put the mulch, but instead of the usual black mulch, I will use clear mulch. (If the bed has collapsed when pouring the water, I will fix it.) Clear mulch lets sunlight through, so it raises the soil temperature more than black mulch.
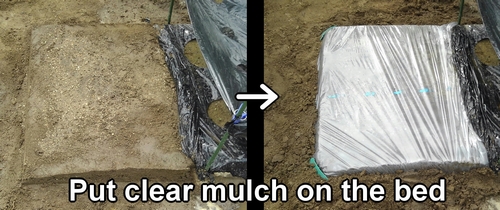
Also, the large amount of water poured on the bed helps. Water transfers heat, so the heat from the sunlight reaches deeper into the soil.
In other words, with clear mulch and a lot of water, the soil becomes steamed, and pests and diseases die. This allows us to sterilize and reset the soil. This method is safe because it uses no disinfectants or chemicals, only the natural power of the sun to clean the soil.
The soil sterilization period using solar heat is about 3 weeks to 1 month. So, it’s good to plan this sterilization work by counting back from the day you will plant the daikon radish seeds.
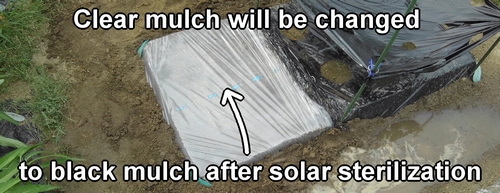
I will change the clear mulch to black mulch about a week before planting the daikon radish seeds.
Following is the video for how-to. English subtitles are available.